Underwater Photography Guide - Top 10 Things You Need To Know
Nov 10, 2019
Top 10 Things To Consider In Underwater Photography
1. What Camera Should I use?
Use what you’re most comfortable. There's no wrong starting point. Action-cams like the GoPro are capable starters, but have limited optical properties and set focal-lengths. Phones are amazing tools and continue to get better as cameras. They are more capable than action cams for imaging and editing, and easier to use. Phones are great starting points that will increase your proficiency, comfort level, and help build your portfolio. Newer phones have multiple lenses, and give you increasing control of settings you can adjust. Click here for a dedicated camera phone guide. For example, the Outex phone case uses optical glass lens ports for unparalleled imaging results, and a universally compatible case that works with all brands, makes, and models, and maintains all of the devices's touchscreen and hard-buttons controls inside the case. There's no app or downloads, so it's faster, better, easier, and cheaper than an action cam.

But we’re focusing here on cameras (DSLR, Mirrorless, Film, Medium Format, etc.) since they offer the most imaging resources and options in term of imaging quality, control, and options. Your creativity should not be limited or bound by the device or technology. But try to maximize the gear you have by mastering the capabilities it affords you. For example, using manual controls to balance focal length, depth of field, and shutter speeds based on environmental conditions and your desired outcomes can be more effective than trying to spend more and ignoring those capabilities. And if your vision means using multiple devices, go for it. By controlling your settings, you can blend content from multiple devices into cohesively edited end results. There are many camera cases and waterproofing options. If possible, use a housing solution that accommodates much of your gear - not just one camera or one lens.
2. Discover The Best Lenses For Underwater Use
Lens choice depends greatly on your creative vision (desired shot) and water conditions. Underwater photography differs most from air/normal photography in multiple ways. Transparency is a big factor, white-balance & the color pallet is different, and lighting and sharpness are greatly affected by water conditions. Besides imaging, gravity rules no longer apply, immensely affecting composition and framing 'rules'.
As a result, wide-angle lenses are often preferred for underwater capture, to take advantage of all of the above. Specifically because proximity to the subject:
- Reduces water variance from being a factor, allowing you shaper, more precise optical focus and definition.
- Reduces lighting variance from being a factor, allowing you to control the lighting as desired and with less fall off.
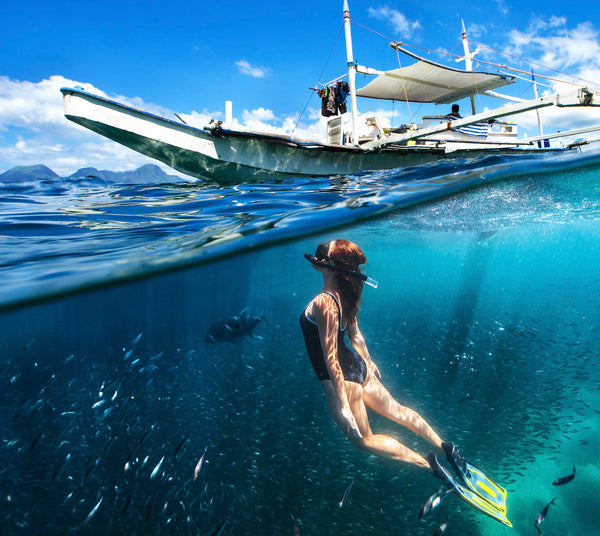
Take advantage of the absence of gravity underwater to frame/compose the shot more freely, from virtually any angle. Unlike photography on land, you can now shoot from above or below the subject, positioning the light and background in ways that were impossible before, including split-level images that encompass both above and below water pictures that often capture people's imagination.

Click here to learn more about split-level photography and dome lens ports.
This does not mean you should only use wide angle lenses. Shooting in a clear swimming pool in a controlled environment is vastly different than in a river, lake or ocean. But Keep in mind that shooting in a new medium requires you to rethink “traditional” rules of engagement and execution of your vision.
Fixed vs. variable focal length lenses are equally useful underwater and you can use both/either, depending on your preferences. If you love a particular fixed lens you can take advantage of your fluid mobility underwater to get closer or farther from your subject matter. While a zoom lens gives your greater flexibility to accommodate the myriad moving parts. For example, a simple portrait session underwater, involves many more variables that the equivalent land version; hair, clothing, air bubbles, etc. More on that later.
3. Consider The Best Underwater Housing System For You
Get the housing that best accommodates your vision, objectives, and budget. There are dedicated housings for diving, or surfing, for example, but they may underperform in a pool, or for travel that are not a good long-term investment - or vice versa. Make sure you consider:
- Design intent; Dive housings are great for diving, but can be heavy, bulky, and expensive. These cases are often camera & lens specific, so you're stuck with what you have. Bags are more modular, but do not offer tactile or precise access to controls and settings, severely limiting usability.
- Optics; Most housings and cases use plastic optical elements, such as acrylic, not glass, and that can be an optical limitation, as well as scratching easily. It’s also important to understand that many housings have a singular lens port for multiple lenses, rather than conforming to each lens. This limits lens use, and creates vignetting of wide-angle lenses, because the lens field-of-view may be partially blocked by the housing enclosure. Make sure your housing can accommodate multiple lenses and is designed to accommodate each lens’s required field-of-view, and optical qualities such as virtual imaging in the case of Domes. Click here for more on Domes.
- Upgradeability; Most people have multiple cameras and lenses they wish to use. As the speed of technology continues increase, consider a housing that can accommodate multiple cameras (DSLR, Mirrorless, Film, Medium Format, etc), multiple lenses (included hooded, curved, or fisheye lenses), and can grow with your needs over time.
- Modularity; Consider as well the possibility of using tripods, triggers, lighting, tethering (cables for power, data, video, control), etc. Not all housings are light enough to be mounted on a drone, a tripod boom, or enable tethering to a computer, battery, or trigger for time-lapse, remote-mounting, or lighting. Consider the costs, weight, and availability of an upgrade path depending on your needs.
- Costs; Factor the initial cost of the housing gear, the upgrade/expand cost over time, and travel costs associated with space & weight.
On one end of the spectrum, hard-case housings, for example are usually dedicated to specific uses, and made for specific cameras and lenses, limiting the buttons and settings you can control underwater. They are often expensive, starting above US $1,200, and not very versatile. For example, scuba housings may perform well at depth, but rely on pressure for the water seal, making them less than ideal for shallow water use, heavy and difficult to transport/travel, and unusable for activities like kayaking, boating, river rafting, etc. And after all that you are shooting through plastic/acrylic, to save on cost & weight, forcing to pay more or upgrade.

On the other end of the spectrum, there are inexpensive cases made of durable plastic bags. They are affordable and universally "compatible" in the sense that you can insert any camera and lens inside. But there's little to no operability of the camera and lens inside given, and you're again shooting thru plastic.

The Outex underwater housing system aims to combine the best of both worlds. It deliver professional performance, universal compatibility with cameras and lenses, tactile-rich control of all operational settings, adds no weight or bulk, modularly upgradeable design, and affordability (US$300). Specifically:
- Optical glass lens ports, including various sized domes
- Patented, malleable, elastic, tactile-rich housing material that can be controlled in hot desert environments above ground, as well as icy underwater conditions
- Universally compatible sizes that accommodate all brands, makes, models
- Lightweight, compact construction adds no weight or bulk
- Modular design compatible with tripods, mounts, lights, triggers, domes, tethering, and more so you can add functionality over time as needed
Click here to learn more.

4. Adjusting For Water Conditions
Opacity may seem like the obvious variable. But it’s more than that. Aside from visibility and debris in the water that may come into frame inadvertently, you should also consider temperature and lighting conditions. Here are some helpful things to keep in mind:
- Factor water visibility and color characteristics into your vision. In other words, research the conditions before you actually shoot, or be prepared to accommodate the realities of the environment into your artistic vision, while shooting or in post-production. Water conditions can vary greatly from lake, river, pool, or ocean conditions - and even within each of those. The same shore break looks wildly different in different currents, weather patterns, and tide. And even pools can look totally different depending on filtration, debris in the water, size, paint color, and surroundings. Factor that into your thinking.
- Lighting travels much differently in water than in air. Most/all of the visibility in most bodies of water are within 10 meters/33 feet of water. Below that you’ll need your own light source. And keep in mind that opacity will impact how far light will travel, so adjust your expectations or settings accordingly.
- Temperature is surprisingly important, because it will impact your comfort and those of the subjects if they’re not in their natural habitat. And it can require additional planning that novices may have not considered, such as wetsuits, weights, length for the shoot, etc.


5. Formulate A Vision
As obvious as this may sound to some, thinking thru your desired outcomes is often more important than anything else, since both preparation and execution depend on it. All of the other points are important, but they can only shape the outcomes based on how you prepare and execute your vision. "If you don’t know where you’re going, that’s exactly where you’ll end up".
Whether it’s your own creative motivation, a specific shot you’re painting with your camera, or the client’s articulation of the results, having a vision for the work will help you get there, as well as the timing and budget.
Be realistic. Expect some surprises and a learning curve. Embrace the unexpected. Reflect on learnings from previous times you were learning a new skill. Enjoy the journey. It's often best to start simple, and increase your ambitions over time. A simple, creative shot can be transformed into something magical underwater, and you can add dimensional elements over time, such as lighting and props for a more dramatic effect.


6. Glass vs. Acrylic Plastic Lenses & Domes
Most housings, even very expensive options, offer plastic or acrylic optical ports. And some of them are good. But there’s a reason your lens uses optical glass inside instead of acrylic – it’s better. Acrylic is cheaper, and lighter, which is the reason it is commonly used. It scratches more easily than glass. Consider housing systems that have that compatibility or upgrade path.
Domes are curved lenses that correct the aberrations caused by the change in light speed as it travels in air versus water. Glass and acrylics have slightly different physical characteristics here as well. But both reduce underwater magnification, and help create more natural, undistorted images that appear both above and underwater. For example, a straw appears bent or broken when inserted into a glass of water. The same phenomenon occurs in photography. Domes alleviate that problem, making it easier for the camera & lens to find focus in the desired area of the image, and balance sharpness across the frame. Not all housings are customized for every lens. So try to find a solution that takes things like focal length, differing lens use, and virtual image for those lenses into account. Click here for additional information on domes' advantages.

7. Select The Right Subject/Model
If you’re capturing native species or natural environments, your concern will revolve around getting them to “behave” in ways that suit your vision, or to show up at all. So again, preparation and understanding of the environmental conditions are key. You can not direct marine life or script a set of circumstances to suit your requirements. But you can be in the right place at the right time to capture that special moment.

Conversely, if you’re hiring a model, keep in mind that dry land skills are completely different from those required underwater. Things to consider:
- Water comfort; Someone not comfortable in the water will not be able to hold their breath and “make faces” if they can’t open their eyes, blow their air out, or hold their pose underwater. Recruit accordingly. “Water-people” such as swimmers, divers, synchronized swimmers, surfers, life-guards, etc.” often make better models than models.
- Attire; Flowy, water resistant material are best. They can be reused and help convey movement and fill up the frame. Bright colors are helpful since the water can dampen some of the dynamic range. Avoid blending in with the background unless you can control it.
- Hair/Makeup; Waterproof makeup is fairly easy to find, and hair spray can add a “layer of protection” to conventional makeup when lightly applied over it. Because of the water’s dampening effect, accentuate the desired level/intensity of the makeup to compensate/accentuate it accordingly. Hair is inevitability a dynamic component of underwater work. Embrace it, or control it. It can add a tremendous element of movement and mystery if desired, but can be a nuisance if not accounted-for.
- Movement; Fluidity is key – pun intended. Think of the difference between a dancer and a cheerleader. Water tends to reward gradual and graceful instead of fast, jerky motion. Use the lack of gravity to fill your composition. Hand & arm movements can fill up the frame, while floating leg movements differentiate them dramatically from what’s possible on land.

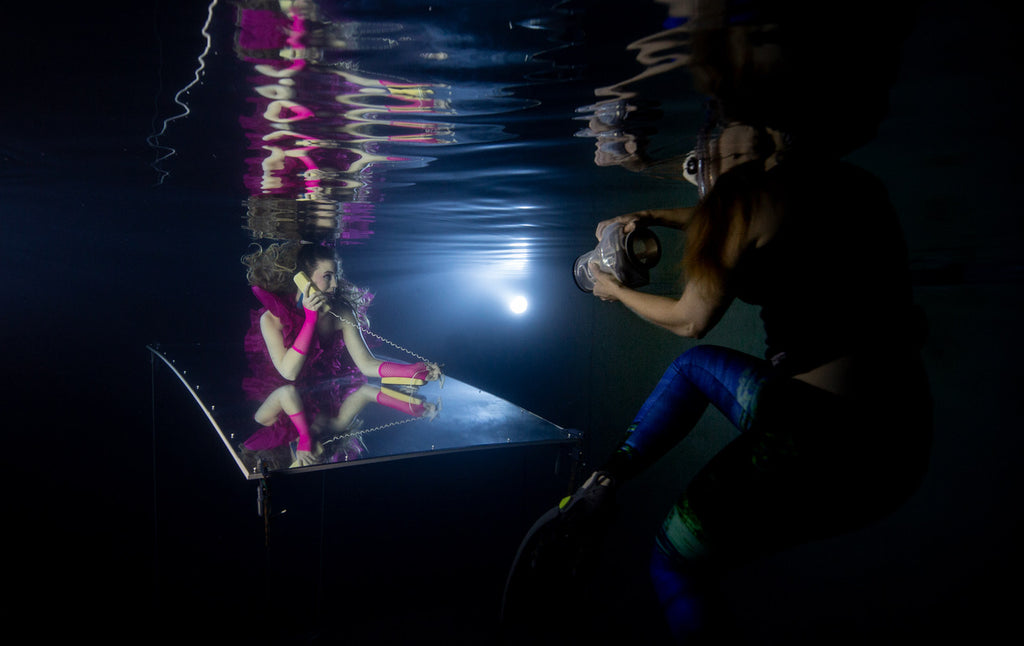
8. Lighting Options
Underwater lighting is perhaps more varied, nuanced, and complex than airborne lighting. Experience comes over time and the rules of engagement are dramatically different. Just as with all photography beauty is in the eye of the beholder, so let's focus on some obvious differences:
- Embrace the color differences water will introduce. Let them guide, inspire, and push your creativity. Most cameras has a white-balance setting you can adjust. For the best results, use a waterproof color card, and adjust your settings prior to your photoshoot accordingly. Post-editing can also help achieve color corrections that suit your preferences and resemble natural tones.
- Consider both strobe & constant-on lighting options. Some housings will accommodate flash/strobe lights inside or tethered to the camera. And there are powerful, capable, waterproof lighting options that are ideally paired for mirrorless cameras’ inherent capabilities. These lights can be used to enhance ambient lighting, or or their own.
- Embrace reflection & refraction. Light changes speed (and therefore direction) as it travels from air into water. It therefore not only reflects from surfaces, but also refracts within the water, creating visual effects that are uniquely aquatic. So whether it's water droplets on the lens or rays of light flowing thru the water, learn to identify them so you can control their effects accordingly.

9. Managing Fogging & Water Beading
There’s no getting around physics, and certain conditions are a direct result of competing elements that don’t usually come together. All cameras are different, and some generate or isolate more heat than others. User conditions are also different, so if you’re running video and tethering in the Bahamas, your heat coefficient is likely different from a casual snorkeler in Southern California. Rather than explaining all the variables associate with fogging, we’re focusing on some tips/tricks:
- Turn your battery on only as needed, since that’s the heating element for the trapped air inside your housing.
- If you can, reduce the amount of trapped air inside the housing.
- Seal your housing in a cool environment. Cool air has less moisture, which will inherently condense less than warmer air.
- Pack a silica-gel pack inside the housing. The moisture-wicking qualities of these desiccant packs helps reduce internal humidity.
- In case of over-heating of the gear, turn it off, allow it to cool, and vent it by opening the housing.
- Avoid direct sunlight to prevent overheating.
- Keep the gear in the housing in an environment that’s similar to your shooting environment. In other words, avoid extreme changes, such as direct sunlight for several minutes right before you jump into a very cold body of water. For example, if you’re in a boat, keep the camera in the shade, covered, or in a cooler so that the temperature swing in use won’t drastically differ.
- Acclimatize in the shooting environment. In other words, wait for the fogging to subside on its own. For example, if you see fogging from jumping into the water, give it a few minutes. The water temperature itself may counterbalance the camera’s battery heat and self-regulate.
- Most housings use acrylic/plastic ports. All Outex ports are made of optical glass. Any hydrophobic substance you can use on glass can be used on Outex glass optics. Examples include RainX, Clarify, etc. Keeping the optics clean of any debris, dirt, body oils & lotions, or any other substance is one of the best things you can do to prevent water from collecting on it. But when it doesn't, simply dipping it back in the water right before you snap can help remove it.

10. Mastering Weightlessness & Flotation
Be prepared to regulate for float, both for the housing, your own, and that of the models. Not all housings allow you to control float, and some may sink. Keep that in mind and inquire as if your housing allows for some sort of float/air control.
The models will have to self-regulate, which usually means letting off air/sinking to a desired position. Help them master this skill if they are new. But practice letting the air out prior to your shot to avoid air bubbles being a distraction if unintended. Keep in mind the subject's comfort in the water both during and between poses.
Behind the camera, you can use weight belts, masks, fins, and/or a wetsuit. Wetsuits increase your buoyancy significantly, so weights may be required. Take into account the model's conditions and adjust accordingly if they are different than yours.