Installation Instructions - Outex Underwater Housing System
Mar 27, 2019
Proper Installation is a Critical Component of Your Experience!
- Watch the installation videos carefully. Details are important. The Outex system is designed to be simple, and to give you both visual, and tactile feedback.
- Perform the test. It will teach you good habits, and teach you critical basics.
- Practice a few times in a controlled environment. The first time is always the hardest. But you'll be a pro after a few uses, and you installation time will decrease dramatically over time.
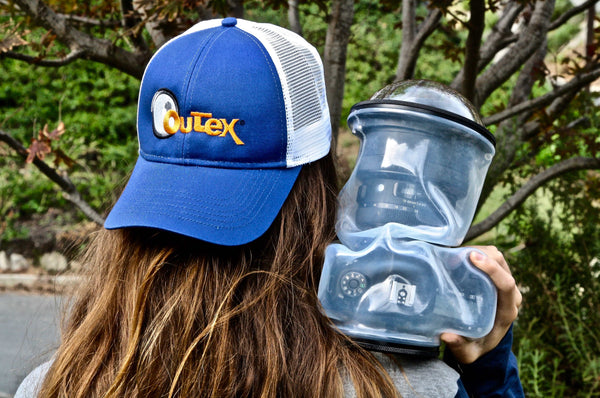
Pro Kits - For Cameras
(Include Cover, Front & Rear Glass, and Straps)
Critical Components of Installation:
1. Cover lip is evenly distributed around the base of the inner flange of the Outex glass rings - around the base of the circumference.
2. Apply the L-shaped middle O-ring facing the right direction. The O-Ring acts as the "female" match to the Cover lip's "male". So the O-Ring opening faces downward towards the cover, creating the seal.
3. When threading/tightening the seal with the outer ring, create the pressure on the Outex parts, not the camera or lens. For example, on the front glass, one hand should hold the inner (inside the cover portion attached to the lens) portion of the flange, and the other hand should be holding the outer ring that threads onto it. This way you are applying pressure onto the seal, and not to the lens itself. The same applies on all/any of the Outex seals.
4. Always conduct the water test in a sink, tub, bucket, pool, or similar calm body of water if you're submerging the camera for use. This will confirm that your installation is correct. If you see continuous escaping air bubbles, repeat the sealing around the affected area (steps 1-3).
Waterproof Seal Test
Entry Kit - For Cameras
(Includes Cover, Front Port, and Straps)
Watch a Professional Underwater Photographer and Outex Ambassador discuss tips and tricks of installation here.
Domes - For Cameras
Clamp Installation example
Adaptor Installation example
Large Dome (180mm) installation order
1. Insert the external nut first thru the lens to prepare for the 2nd/final seal.
2. Secure dome to lens using the adaptor (threads) or clamp. Just enough to secure it. No need to over-tighten it.
3. Remove internal washes & nut.
4. Pull cover over the dome internal metal rim, using the rim as guide for the cover's "built-in" or ring. Ensure the cover lip is evenly distributed around the metal rim.
5. Apply washer's "female" side against the cover's "male" o-ring.
6. Hand thread on internal nut to compress washer and create internal waterproof seal. Use one hand to hold the internal dome metal ring, as the other hand applies pressure on the nut. In other words, apply pressure to the seal - not the lens' filter thread. Just like an Outex flat port front glass.
7. Insert rubber o-ring into the dome's grove to create the 2nd/final seal.
8. Place/set it all into the dome itself.
9. Bring the external nut from step 1 towards it to thread on the final/2nd seal. Hand thread it first until it's nice and tight.
10. Use metal wrenches to apply addition pressure onto the seal. Ensure that you maintain the wrenches at 90 degrees from the ridges to avoid stripping them. In other words, do not torque or twist them.


Tethering/Cable Installation
As you can see from our thousands of customers on every continent, military users, online community, etc, Outex is designed to protect your gear in any environmental condition and underwater (down to 10 meters/33feet) using a mirrorless underwater housing system. Always follow the installation instructions from the videos, especially as it relates to the seals. Contact us if you have questions or need help.
When used underwater (including in & out of the water) for extended periods of time (2+ hours), please monitor/check frequently to ensure the seals are firm/secure and re-tighten the seals as needed. Extended manipulation of the camera inside the housing/cover sometimes loosens the seal and can lead to leaks over time. By re-tightening and checking over time you're reducing the chances of an accidental breach.
Critical Components of Installation:
- Cover lip is evenly distributed around the base of the inner flange of the Outex glass rings - around the base of the circumference.
- Apply the L-shaped middle O-ring facing the right direction. The O-Ring acts as the "female" match to the Cover lip's "male". So the O-Ring opening faces downward towards the cover, creating the seal.
- When threading/tightening the seal with the outer ring, create the pressure on the Outex parts, not the camera or lens. For example, on the front glass, one hand should hold the inner (inside the cover portion attached to the lens) portion of the flange, and the other hand should be holding the outer ring that threads onto it. This way you are applying pressure onto the seal, and not to the lens itself. The same applies on all/any of the Outex seals.
- Always conduct the water test in a sink, tub, bucket, pool, or similar calm body of water if you're submerging the camera for use. This will confirm that your installation is correct. If you see continuous escaping air bubbles, repeat the sealing around the affected area (steps 1-3).
Using the Camera and Lens Through the Waterproof Housing System
Phone Kit Installation
Phone kit installation is very similar to all other Outex products. The Cover creates a waterproof seal in conjunction with the lens port.
As with all Outex installation, to avoid breaking or damaging any of the items involved if you drop them, we suggest you perform the installation while sitting down with the devices over your lap, or at a table with a soft top such as towel or cloth.
Test the installation without any gear inside first. This process will teach you good habits and critical basics of the Outex seal process, just like our camera products. The wrist strap goes thru the cover loop.
Phone test video
- Insert the phone into the Outex cover thru the opening, with the phone camera lens facing forward/outward thru the lens opening. Hold the cover with one hand and phone with the other and shuffle the phone back & forth until it’s fully inserted. Set it aside.
- Remove the washer & nut from the lens port by unthreading them from counterclockwise. Insert the lens port into the cover’s built-in channel inside the opening, ensuring the cover opening ‘lip’ is evenly distributed all the way around. The built-in channel inside the cover secures the port in place.
- Place the washer onto the port with the washer’s female/L-shaped side in direct contact with the cover’s male lip. The washer’s flat surface side should be facing up, exposed. Now thread the nut clockwise against the port’s threads. Use one hand to pickup & hold the phone/cover, and the other to screw in the nut on the port’s thread. Tighten it until secure but turning it several times. Threading it will create the waterproof seal.
Phone case installation video
The Phone Dome Port installation is identical to the flat lens port, except that the Dome’s washer & nut are built into the Dome itself.
Phone dome benefits example video
Use the hard buttons to operate your camera. Most phones are pre-programed that way already, but you can also customize the hard buttons by reconfiguring them in settings. The cover reduces the touchscreen sensitivity but allows you to operate basic functions. Water pressure will disable touchscreen control, but you can use it at the surface.
Helpful Installation Tips for the Phone Kits
- Remove any external phone cases.
- The wrist strap is the best way to ensure you won’t drop or sink your kit.
- The Dome adds significant buoyancy as it traps enough air inside to float most phones.
- Operate the phone using hard buttons and touchscreen pressure rather than sliding your fingers on the touchscreen. Water pressure will prevent use of the touchscreen, but you can use it above water, then use the hard buttons underwater as needed.
- Explore your camera’s lens and imaging settings. Most phones have more than one lenses for different focal lengths and your results will vary/depend accordingly.
Additional Resources
Please browse our YouTube.com/Outex channel for additional videos, tips, and tricks.
Outex Is Not Insurance